Step 1: Add Job Categories, Natures, Levels, and Locations #
The first step is to insert the different categories, natures, levels, and locations of jobs you’ll start offering. And the process to add all of these is the same.
So, let’s take an example by adding a job category.
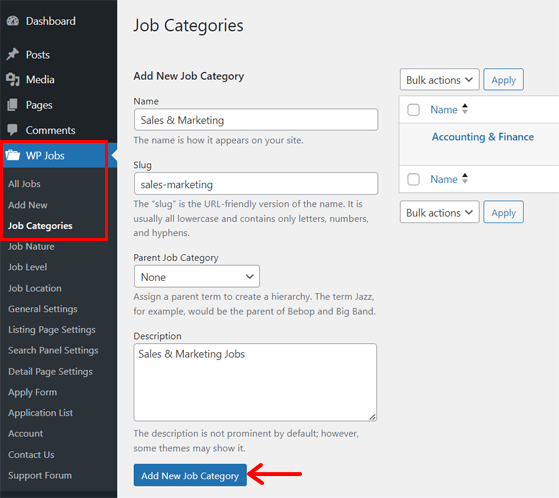
Navigate to the ‘WP Jobs > Categories’ menu. There, insert the name, slug, and description of the job category. Next, click the ‘Add New Job Category’ button. That’s it!
You can now do the same for others. All the options are inside the ‘WP Jobs’ menu.
Step 2: Add a New Job Opening #
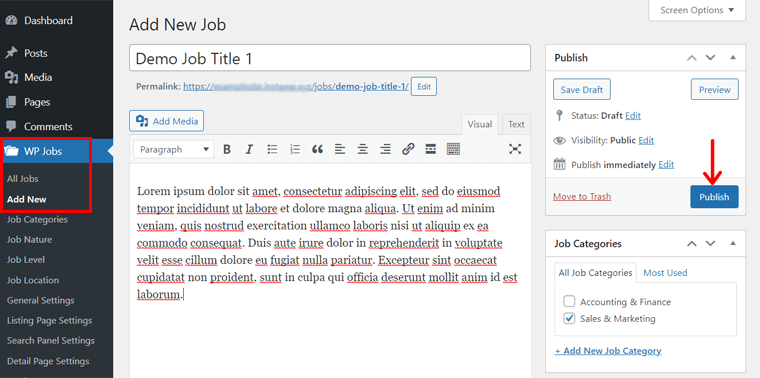
Following that, you can add the first job opening to your portal. For that, open the ‘WP Jobs > Add New Job’ menu. There, you can fill out all the information regarding the job.
Hence, start by adding the title, description, details, responsibilities, skills required, etc. After that, pick the category, nature, level, deadline and location for this particular job.
Lastly, click the ‘Publish’ button to make the job vacancy go live.
Now, do the same for all the jobs available. That’s all!
Step 3: Display Jobs in Your Career Page #
Now, you should use a shortcode to display these job openings on your website. Among the different shortcodes available. Let’s use the basic one!
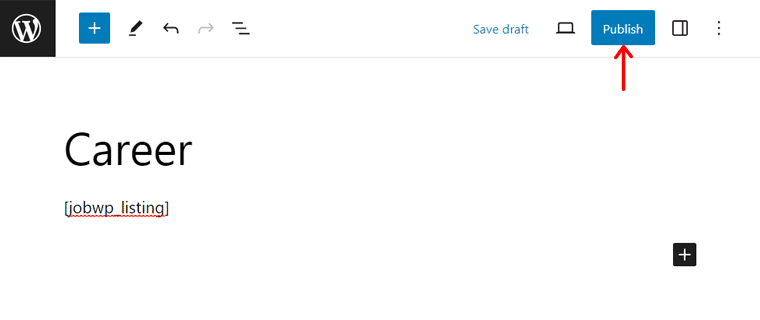
First, navigate to the ‘Pages > Add New’ menu to create a new page.

This opens the WordPress page editor, where you can insert the title ‘Career’. Below that, add this shortcode, ‘[jobwp_listing]’. Next, hit the ‘Publish’ button.
That’s how you build a job listing page on your website. Best of all, WordPress automatically adds this career page to your navigational menu.
Likewise, you can use other shortcodes mentioned in the features section as per your needs.
Congratulations! This ends the process of building your job board site. But there’s more!


